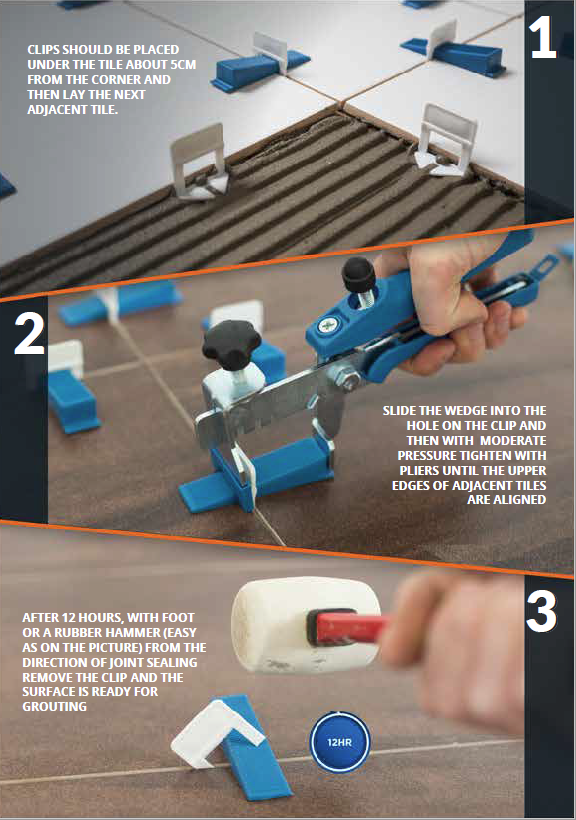
The tile levelling system process involved in achieving level tiles using System Leveling is very simple. Please watch the video clip demonstration below to see how a perfect finish can be achieved.
- After preparing the surface to be tiled and applying the tile glue, place the first tile in position. Approximately 5cm from the corners of the tile, slide a tile clip into position under the tile. Ensure there is not an excessive amount of glue build up to the side of the clip. For large size or thicker and heavier tiles a clip can also be placed in the middle section of the tile. Place the next adjacent tile in position on top of the clips of the first tile.
- Slide the tile wedge through the opening of the clip. Fasten securely using the tile pliers using moderate firm pressure until the upper surface of the adjacent tiles are level.
- Leave the tile clips and wedges in place for approximately 12hrs or until glue has set. Remove the tile levelling system either by kicking or with rubber mallet parallel along grout line. (Do not attempt to remove at 90 degree angle to grout line.) The clip will break clean from the under side of the tile. The wedges can be reused many times until the teeth are exhausted. The tile are now ready for grouting!

